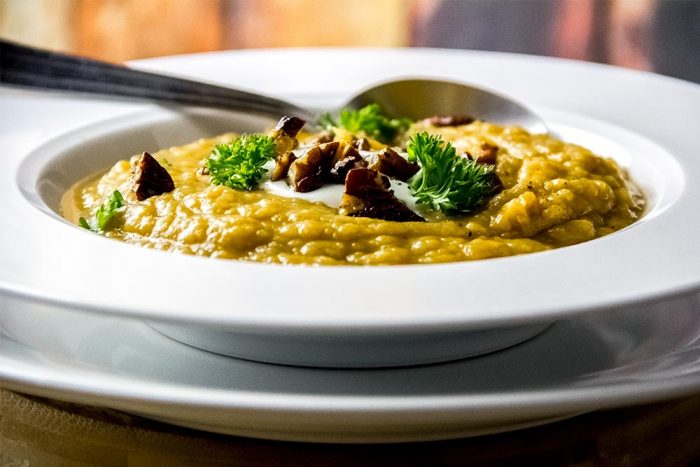
As I was making this soup last night, I wondered why I don’t just make soup exclusively. It’s so easy and I can prepare so much all at once. And, of course, it’s delicious. It’s one of my favorite things to eat for dinner. Oh yeah, there are also about a billion different recipes for […]
Poached Salmon with Pink Grapefruit, Vidalia Onion & Honey Recipe
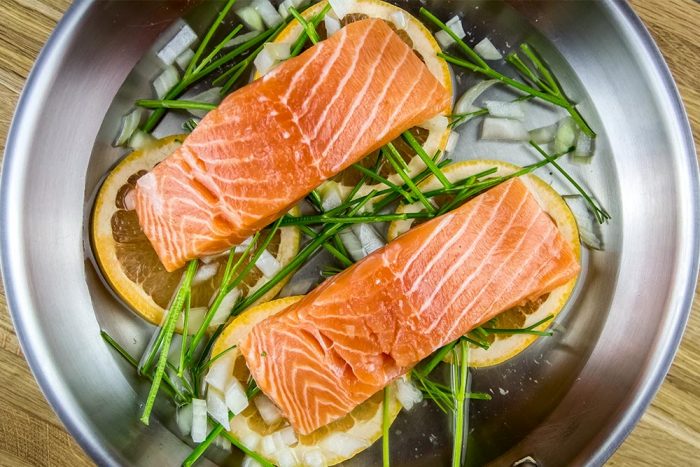
Last night, I had the urge to prepare one of the poached salmon dishes I made over a year ago, but I didn’t want to make it the same exact way as I did previously. One of the most prominent aspects of the previous dish was the use of lemons as part of the poaching […]
Superfood Butternut Squash, Broccoli & Quinoa Salad Recipe by Gordon Ramsay
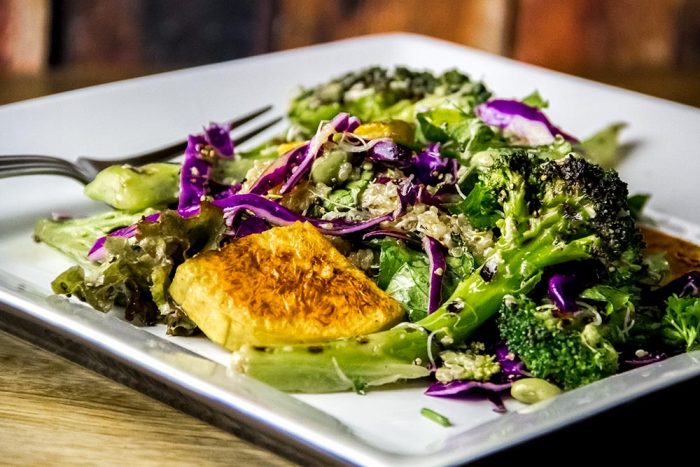
I have never eaten a salad quite like this. When I first took a look at the recipe, I thought it was going to take a tremendous amount of work to put it together, but as it ends up, it really wasn’t that difficult after all. Of course, there was drama involved, which I’ll tell […]
Roasted Cauliflower & Red Onion with Honey Ginger Vinaigrette Recipe
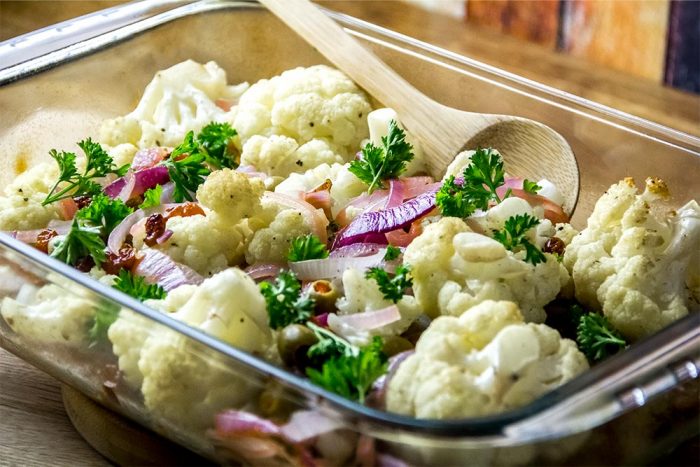
This recipe was the fourth in this week’s group and I really wasn’t sure what to make of it. I knew I enjoyed roasted cauliflower, but as for the remainder of the ingredients, I just wasn’t sold on them. Red onion and raisins? Olives and parsley? I had never experienced a flavor profile quite like […]
Stuffed Portobello Mushrooms with Sweet Potato, Spinach & Couscous Recipe
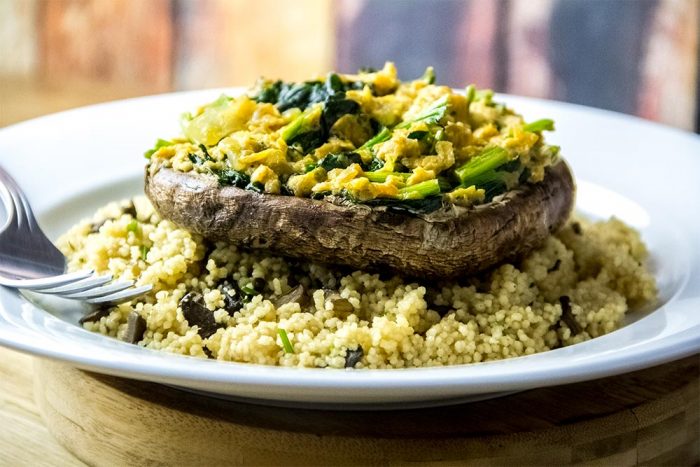
When I first took a look at this recipe, I had no idea if I’d be able to pull it off. Once I got going in the kitchen though, I discovered that it was much more straightforward than I first thought. Not only is the recipe completely doable, it’s actually rather simple. All I had […]
Rotini Pasta Salad with Fennel, Red Onions & Sun Dried Tomatoes Recipe

Whenever I see a recipe that has anything to do with a pasta salad, I’m in. I’m all in. I love pasta salads. Fortunately for me, I have a cookbook that’s full of them. And the best part is that this cookbook has different variations of the same salad, so I’m able to enjoy many […]
Fettuccini with Cheesy Spinach & Artichoke Alfredo Sauce Recipe
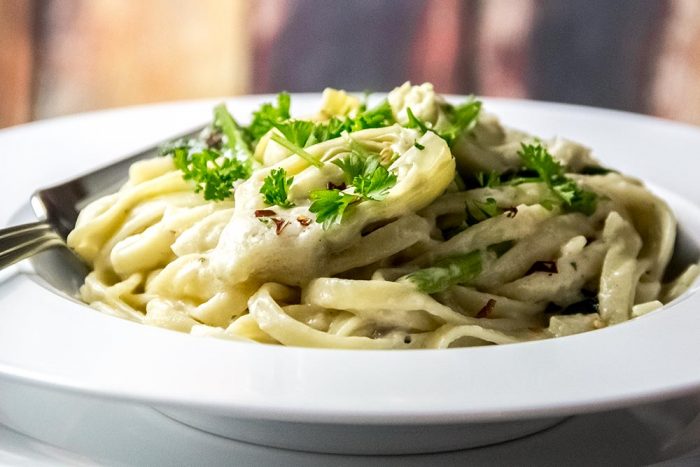
There was a huge Italian restaurant near my hometown that offered “family style” dishes that arrived at the table in large skillets (the ones they were prepared in). If I were to order something like what’s contained in this recipe, I’d get the entire pound of pasta, along with full garlic cloves that were cooked […]
Bulgur Salad with Wilted Kale, Apple & Browned Butter Vinaigrette Recipe
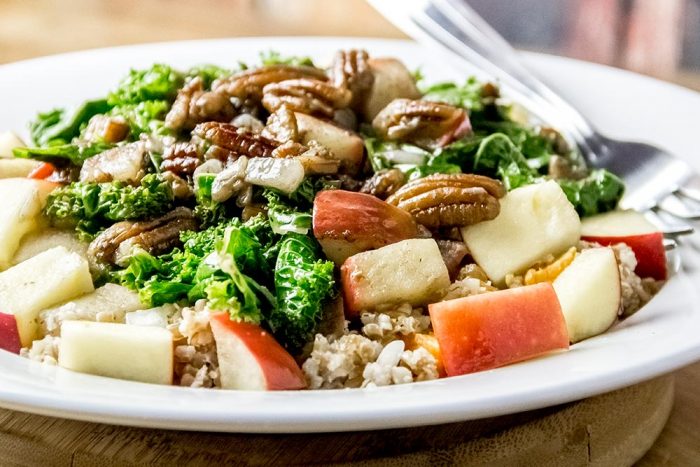
I didn’t know how this recipe was going to turn out, but I gave it a shot anyway. This is one that Laura found online and after reading through the instructions, I knew I’d have to add a few of my own twists to things. I’m very happy that I went forth with it though […]
Farro Salad with Smoked Cheddar & Honey Mustard Vinaigrette Recipe
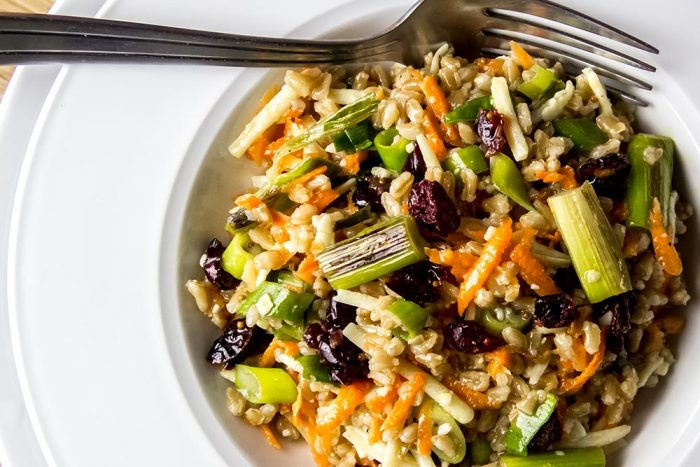
I just finished eating a bowl of this wonderful salad and I am happy to report that it was very good. I mean that. It was simply delightful. Farro is a grain I don’t eat very often, but its simple cooking method, great flavor and pleasing texture are going to put it on my list […]
Quinoa Salad with Edamame, Basil, Mint, Dill & Avocado Salad Recipe
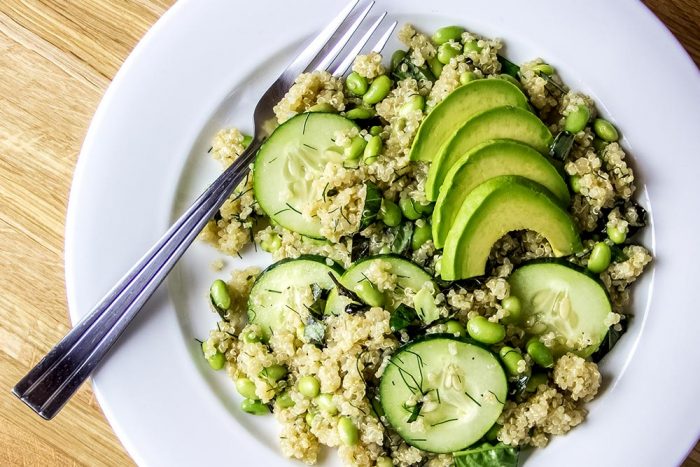
A few weeks ago, I purchased a large five pound bag of quinoa. I wanted to prepare a quinoa salad, which I did. I shared it right here on this blog. That salad I made was so good that we began looking for more similar looking ones. Laura browsed online for a little while and […]
- « Previous Page
- 1
- …
- 23
- 24
- 25
- 26
- 27
- …
- 43
- Next Page »