Here’s the deal with making bread – pretty much every recipe you look at will be somewhat intimidating. Once you make whatever it is you’re trying to make once though, the next time will be a snap. That’s the truth about things. Making bread really isn’t difficult. All you need is a little practice. Hey, if those people in bakeries can make all different types of loaves, day in and day out, we can do it too.
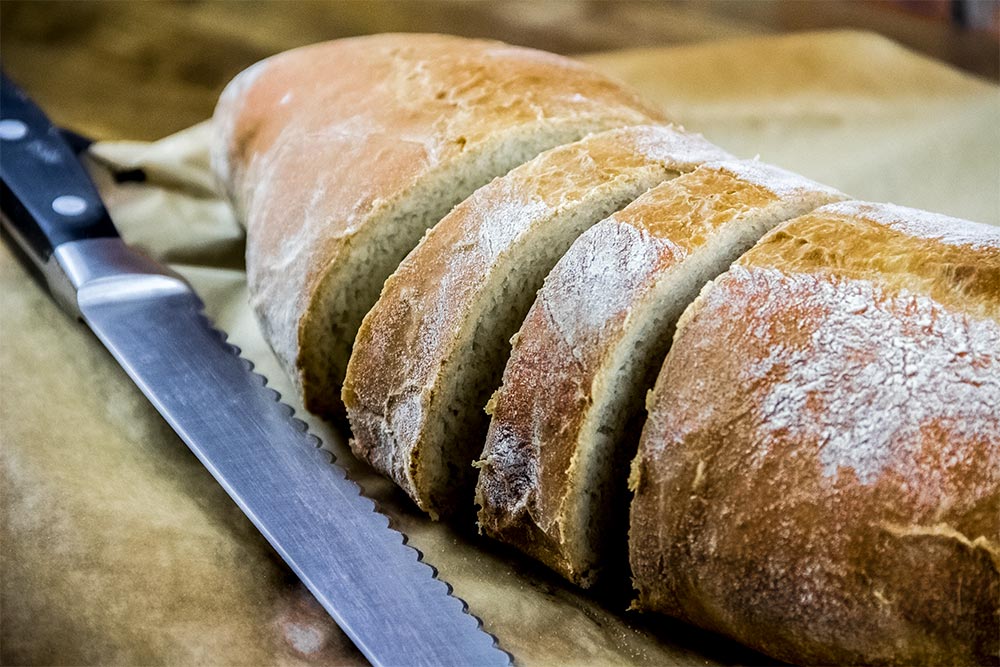
As I make my way through my Bread Illustrated book, I’m picking up on a few things. So far, I know that temperature matters when it comes to the dough rising. Also, the yeast I use has to be good. It can’t be old and dead. Flavor is derived from rising time and if you are using a relatively fast rise, using beer as a liquid can compensate for some of the lost flavor. Finally, kneading is important. Kneading creates gluten which creates elasticity. Gas is created as the dough rests and that gas creates little air pockets which makes the dough rise. Without the elasticity, the gas would escape through the dough’s surface and it wouldn’t properly rise. It’s all really simple if you think about it long enough.
The Recipe
This is the recipe you should be thinking of when good ol’ traditional bread comes to mind. Bread flour, yeast, salt, water, beer and oil is all you need. Mix everything together, knead the dough for a few minutes, let it rise and bake it. This type of bread making can’t get any more straightforward. If I had to guess, the kneading and rising is what makes people nervous. Well, if you follow my instructions below, I can walk you through the way to a perfect loaf of classic Italian bread. I promise.
As I mentioned above, because of the relatively fast rise of this dough (1 1/2 hours), there isn’t much flavor development. To overcome this, the recipe creators used beer as the majority of the necessary liquid. The beer adds back come of the nice yeasty flavor that’s present in breads with a much longer rise time.
Another aspect of this bread is how the loaf is formed. Initially, it’s flattened out after it rises and then it’s folded and rolled in such a way that it’s densest in the center. It’s also pulled taut around the surface, so it will appear tight when it’s finished baking.
I’m excited about this recipe because I never, in a million years, thought I’d be making real Italian bread. Today, I did just that and it came out perfectly. If I can do it, anyone can.
Ingredients
Makes: 1 Loaf of Bread
3 Cups Bread Flower
1 1/2 Teaspoons Rapid-Rise Yeast
1 1/2 Teaspoons Salt
1 Cup Lager, Room Temperature
6 Tablespoons Water, Room Temperature
2 Tablespoons Extra-Virgin Olive Oil
Step-by-Step Instructions
I’d like to thank America’s Test Kitchen for their cookbook called Bread Illustrated. So far, this little bit of heaven has been wonderful to me. I’ve perfectly made a few loaves of bread so far and I have this organization to thank. I’ve messed up a lot of bread making efforts in my life, but I don’t see that happening anymore. So thank you again.
Mix Dry Ingredients
In the bowl of a stand mixer, add the flour, yeast and salt.
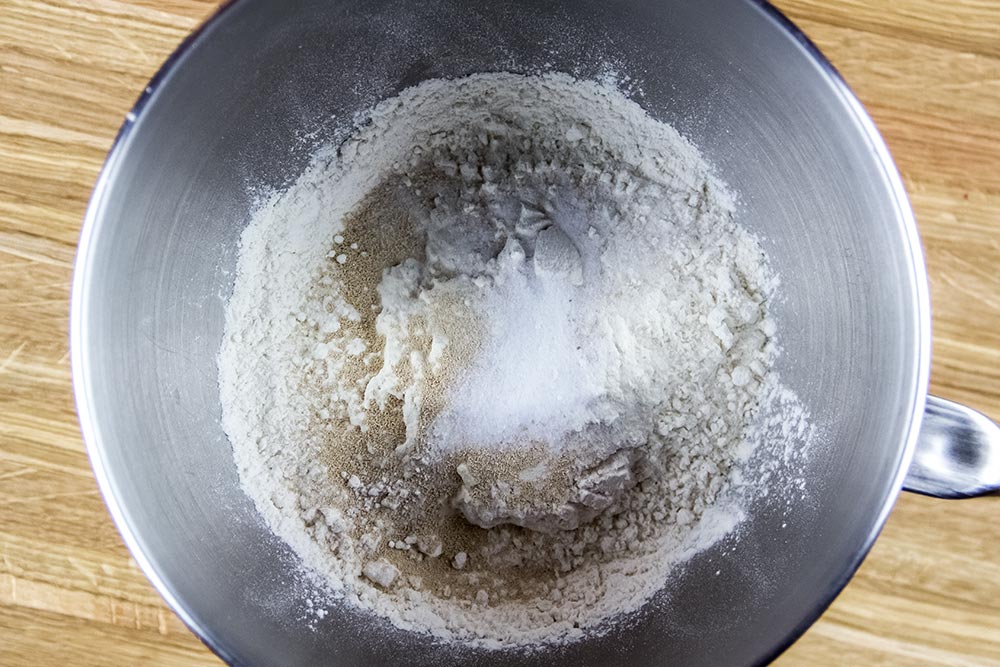
With a whisk, mix these ingredients well.
Mix Wet Ingredients
In a 4-cup measuring cup, add the beer, water and olive oil.

Mix these ingredients as well.
Mix the Dough
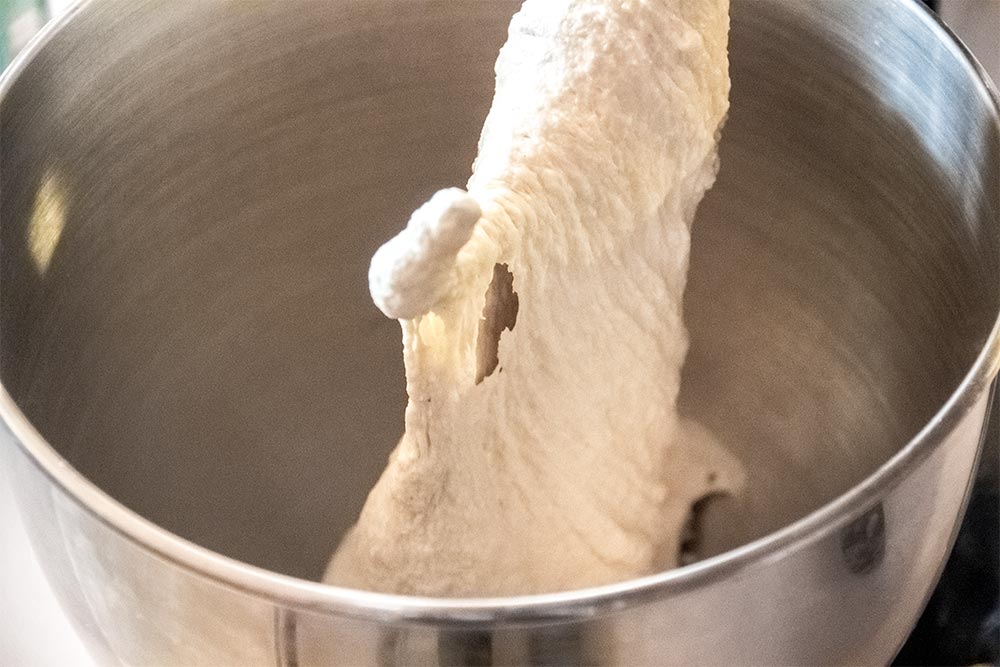
Attach the bowl to the stand mixer (and use the hook attachment), turn the mixer on low and begin to pour the wet ingredients into the bowl slowly. When all the wet ingredients are added to the bowl and the dough begins to come together, increase the speed to medium-low and continue mixing for 8 minutes. You may need to stop from time to time to scrape the dough from the hook attachment. This is the primary process for creating the necessary gluten structure.
Knead the Dough by Hand
Next, lightly flour a counter top and pour the dough from the bowl onto it. Then, while adding flour if necessary, knead the dough by hand for about 1 minute. After that, pull the dough into a ball and add it to a lightly oiled large bowl.
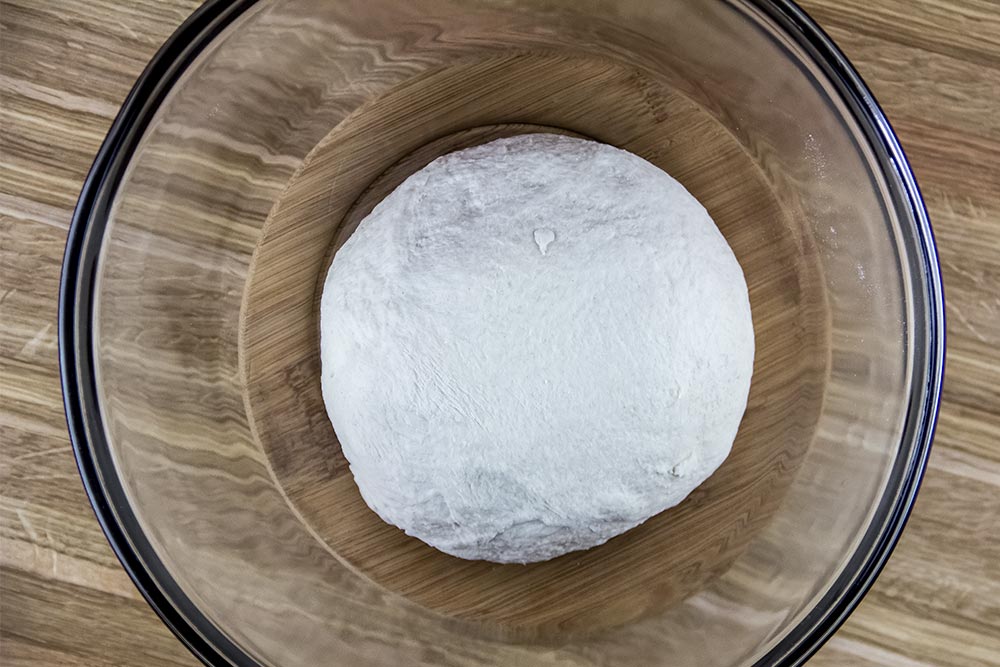
Cover the bowl tightly with a piece of plastic wrap and let the dough rise for about 1 1/2 hours. Now, it’s important to keep the bowl in room temperature or around 70 degrees Fahrenheit. If the temperature is too warm, the dough will rise too fast and if it’s too cool, it’ll rise too slowly. This is one area to be very careful of when making bread.
Shape the Dough
The next step is to shape the dough into something that looks like Italian bread. The method for doing this isn’t to simply roll it into a tube shape. I’ll explain below.
After the dough has risen to about double its original size, remove it from the bowl and place it on a lightly floured counter top. Then, tamp the dough down with your fingertips and shape it into a 10 inch square. After that, fold the two top corners down to the center of the square, as if you’re making an envelope.
So far, you should have a hunk of dough on the counter that looks like a house. A few walls and a roof. Continuing on – take the peak of the roof, or the top point of the dough, and fold 1/3 of the piece down onto itself. Then, take the dough from the top and fold it towards you in half.
The basic premise is this – you initially make a square. Then, to add extra dough to the center of the loaf you’re making, you need to fold some material in onto itself. After that, you continue to roll the dough up so it looks sort of like an Italian bread. At the same time, you’re stretching the outside of the dough so it’s nice and tight and will hold its shape while baking.
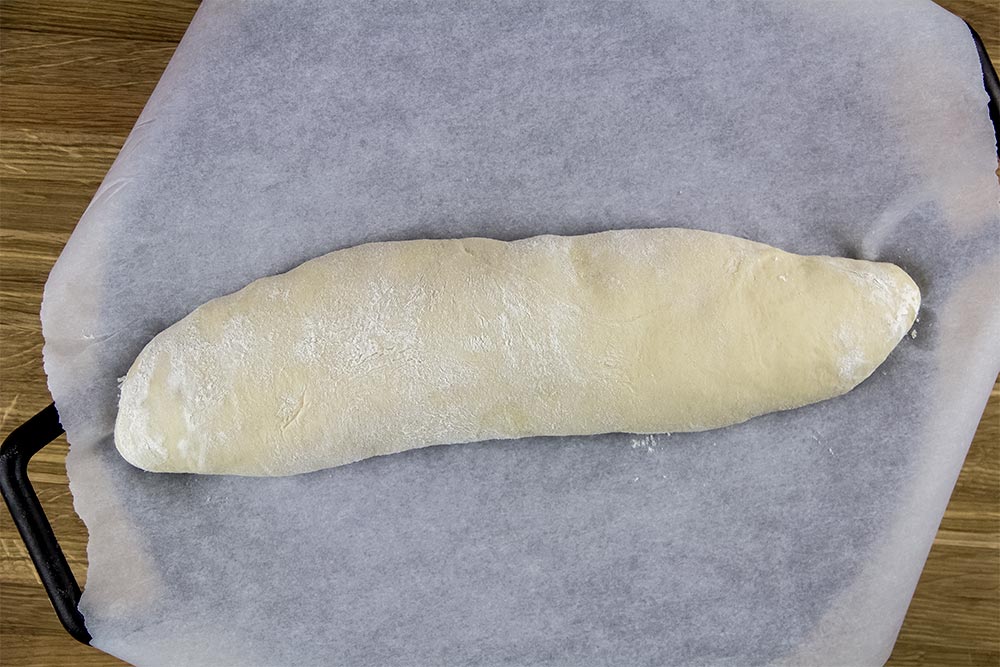
When you’re finished with all that, carefully slide your hands under each side of the dough and place it on top of a piece of parchment paper, seam side down. The final piece should be about 15 inches long and 4 inches wide. If it isn’t these measurements, you can roll it gently until it stretches into shape.
Let Dough Rise Again
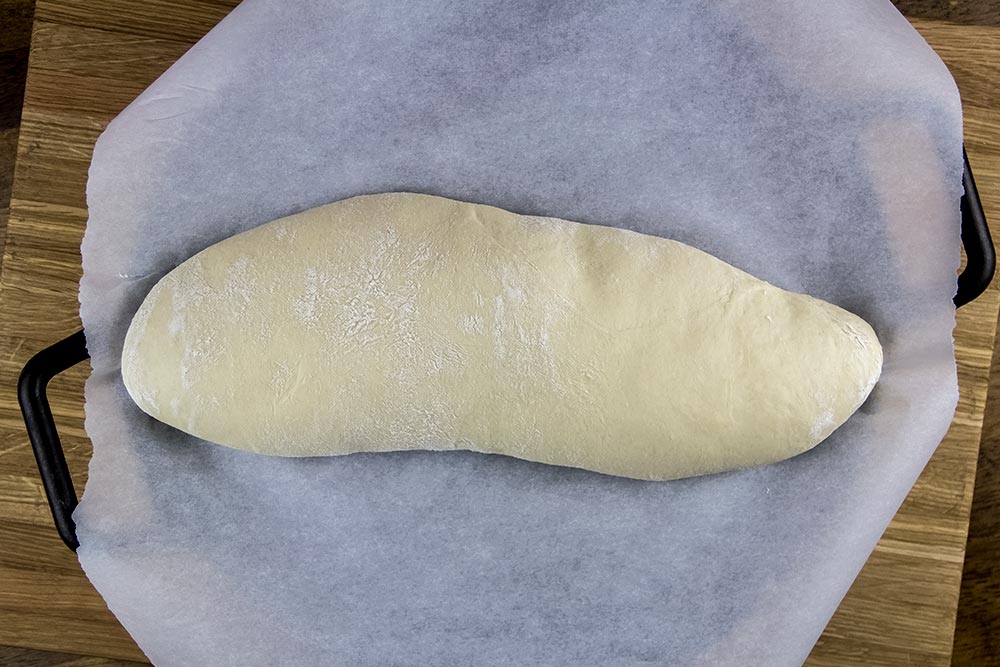
Gently cover the dough with a piece of plastic wrap. You can just lay the plastic on top of it. Let the dough rise for another 30 minutes to one hour, again, keeping tabs on the room temperature of around 70 degrees. The dough should rise about 50%.
Pre-Heat Oven
About 15 minutes before the end of the second rise, adjust one of your oven racks to the center position. Then, warm the oven to 450 degrees.
Bake the Bread
After the dough has risen for the second time, make a slice across the top of it about 1/2 inch deep (using a very sharp knife or a razor blade), keeping about 2 inches on each side untouched.
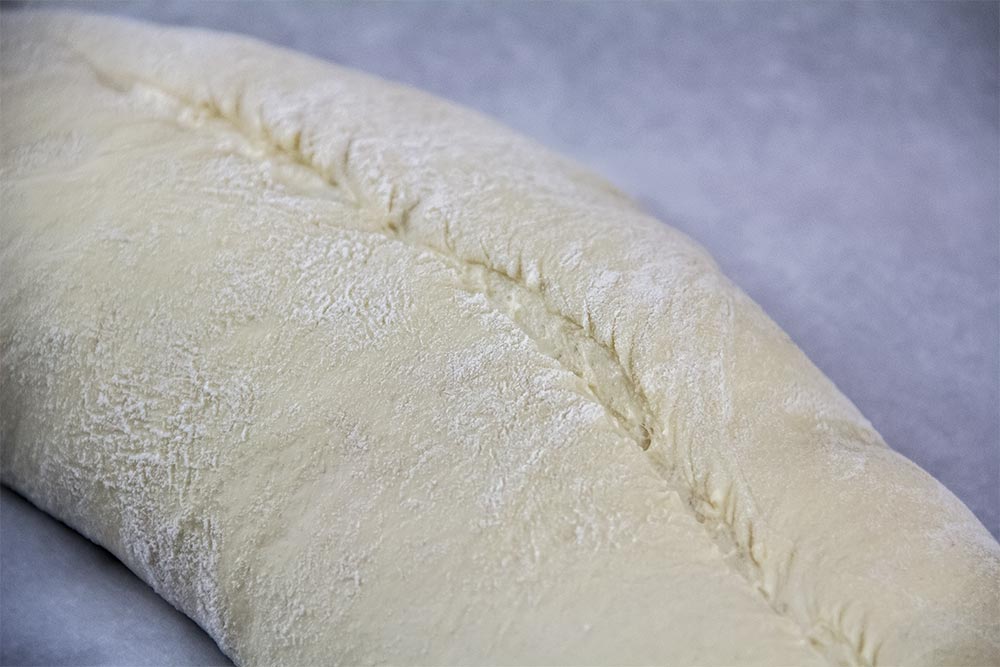
This slice will allow the bread to open up and rise more in the oven.
Next, pick up the edges of the parchment paper and slide it onto a heavy baking sheet. I used my cast iron pizza sheet. When the oven is to temperature, place the baking sheet onto the center rack and let the bread bake for 25 to 30 minutes, rotating the tray half way through.
The Final Bread
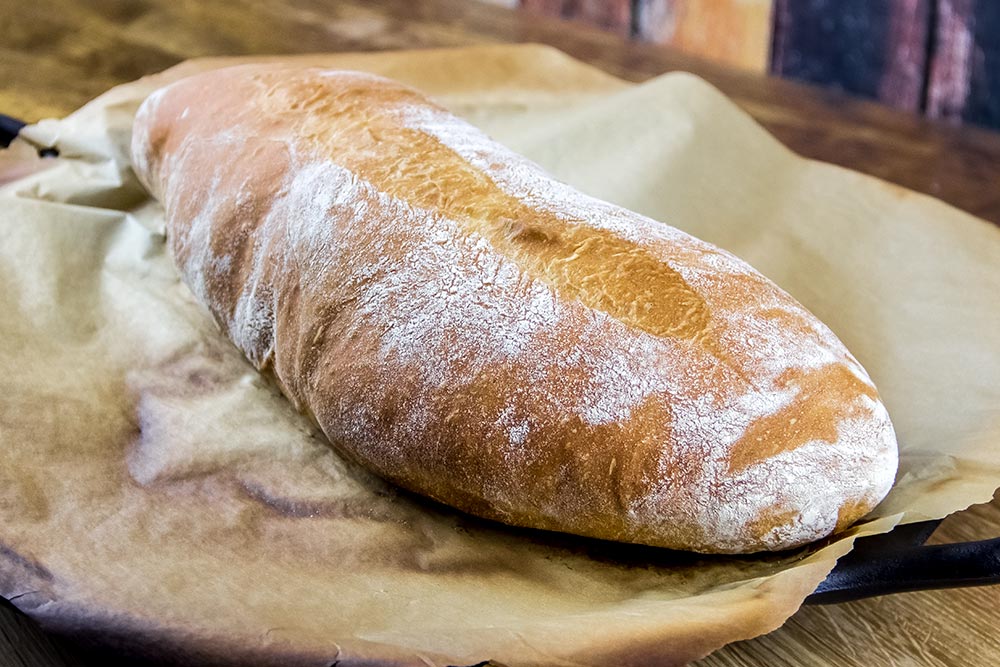
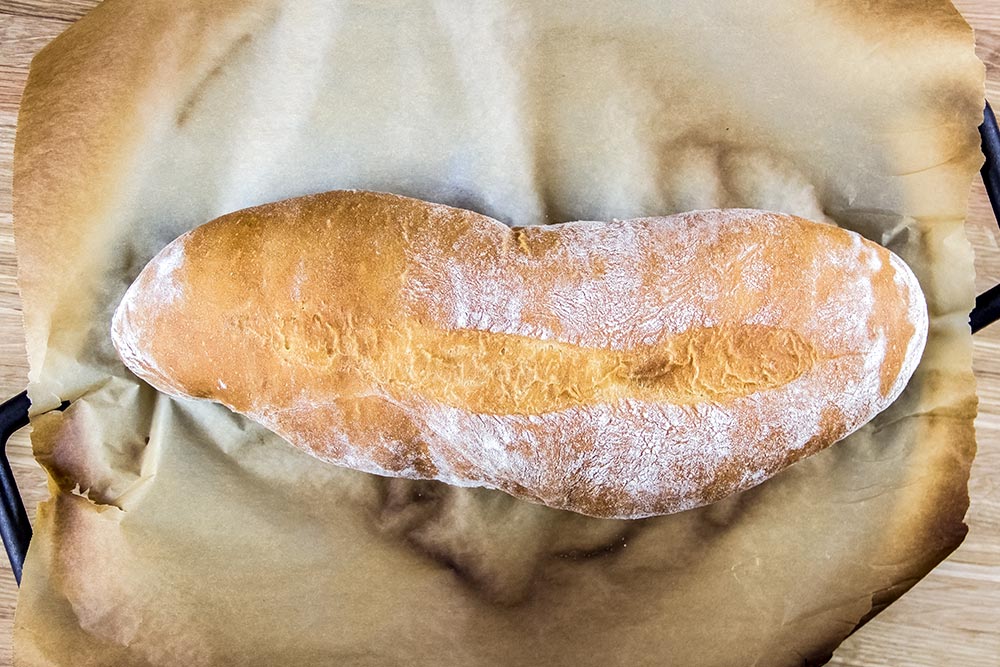
I’m not sure I’ll ever get used to the fact that so few and such simple ingredients can make something so wonderful. I mean really now. Anyway, when you’re bread looks like this, remove it from the oven and turn off the heat. Let everything cool for about an hour before cutting into it.
A real perk to baking bread is that the house smells great the entire time. Even when the dough is rising, the house smells good. Give this one a try and let me know how you make out. Thanks for reading!
I noticed that you deviated from the instructions in Bread Illustrated a bit. You put your oven rack in the middle position instead of the lower-middle position, didn’t use a baking stone that pre-heated with the oven, and didn’t mist the bread before baking it. Are these things you forgot to mention, or are these things you do differently?
The first one I made got semi-burnt on the outside. Since then I have lowered the over temperature to 425 after the bread goes in, but I find the crust doesn’t stay hard after the bread cools. It still tastes amazing though. I’ll try it again leaving the oven at 450, but baking it for less time. Or maybe lower it a bit, but not 25 degrees.
Hi Brian,
Good points. I did switch things up a bit. My results were really good, so I don’t think they mattered much. What I found as I go through America’s Test Kitchen cookbooks is that they sometimes add somewhat frivolous steps. I’ve made a whole lot of their recipes and have decided a while back that I should rely on my own sense of how I want things to turn out. Regarding this recipe, if memory serves, the bread would have burned if I had lowered the rack any. My oven gets too hot down there. Also, the bottom of the bread was perfect, so no pre-heating of the stone, or my cast iron pan, was necessary. I suppose if you were using a stone, that may have been more important. I don’t have one, so my pizza sheet it was.
Anyway, thanks for the comment. To answer your question more directly, I did change things up somewhat. Let me know how your next try works out.
Thanks!
Jay
Hi,
I made another loaf last night, and this time I didn’t lower the oven temperature. I did bake the bread for 24 minutes instead of the 25-30. Any longer and I think it would have gotten too dark. The internal temperature was between 205 and 210, so that worked out fine.
However, after the bread cooled, the crust once again went soft. The ends of the bread stayed crisp, but everything else went soft, as though it was stored in a plastic bag. I am not sure if I am misting the loaf too much, or if I am not making the loaf tight enough. I know the good loaves from the bakery have a crisp crust even after a couple of days in the fridge. I’ve tried misting the oven a couple of times during the first half of baking, but nothing seems to help. Without misting, does your crust stay crisp?
When I had my father try the one to the first loaves I made, after commenting on how it tasted just like the bread from the Italian bakery my grandparents used to buy bread from, he asked if I sprayed the bread with water because that it what makes the crust extra crispy. Maybe I am wetting it too much.
Hi Brian,
I think you’re right. You may be wetting it too much. Since this bread is so awesome, why not make two loaves next time? Try lightly misting one of them and then not adding any mist to the other. That would be a great experiment to see which you like more. If you do this, please let me know how things turn out.
Thanks!
Jay
PS – Without misting at all, my crust was nice and crisp. If you look closely at some of the final photos in my post, you can see the crumb.
I’m going to make another loaf tomorrow night (tonight was their focaccia recipe), and I’ll do a very light misting. I’ll might make a second loaf right after with no misting. I’ll definitely report back.
So I made two loaves tonight. The first one I misted lightly on the finest setting my spray bottle has. The crust softened on it. For the second one, I decided to mist it even less. It still softened.
I’m thinking maybe I am letting it rise the second time for too long. I usually leave it for the full hour, after leaving if for the 90 minutes for the first rise. I may try two more tomorrow again: one that rises for 90 minutes and then 30 minutes, and a second one that rises for 60 minutes and then 30 minutes. The dough might be getting too loose with the long rising time.
Hi Brian,
I’m thinking that such a light mist would evaporate not too long after the bread went in the oven. Is the dough too wet overall? Something is definitely going on. I’d love to see some photos.
Jay
It could be too wet, I suppose. It definitely doesn’t look as dry as yours does. I don’t add much flour when I need it before the first rise; basically just what’s on the counter to keep it from sticking. I intend on making two loaves again tonight, so I can take a picture of one loaf that I will make as I usually do, but with a shorter rise time, and on the other one I will add flour so that it ends up looking more like your dough. The flour I get in Canada is probably different than the one you get in the States, so I may need less liquid and/or more flour. Last might I made the dough based on the weight given for the flour in the recipe, so I’m not putting in too little flour according to the recipe.
I’m determined to figure this out to get perfect bread.
Oddly enough, I have made close to 300 recipes from America’s Test Kitchen/Cook’s Country/Cook’s Illustrated, and I have never had this kind of difficulty. The other night I went deeper into the Bread Illustrated book and made the rosemary focaccia, which by its placement in the book, should be harder to make than this bread. It came out perfectly and posed no problems. It was also a huge hit at work; I recommend you try it as soon as possible!
Some success? Tonight I made one loaf. I made sure the dough was not too wet by adding flour during kneading so that it felt the way dough should feel when it’s well floured and won’t stick to your hands. I let it rise for 90 minutes the first time. Then I shaped it and used more flour as needed, and then let it rest for 30 minutes instead of 60. Then I slashed it down the middle, misted it lightly, and baked it for 22 minutes on the baking stone at 450.
Below is a picture of the finished bread. The picture quality isn’t that great, so I apologize. I am one of the last people using a Windows 10 Mobile phone, and the latest Insider preview seems to have caused the camera to take pictures at a third the resolution that it normally does.
https://c1.staticflickr.com/3/2869/33374485431_e8c9d7a880_o.jpg
Anyhow, you can still see the end result. I finally got the top the way I always wanted it. That’s how it looks when you buy it from a bakery. And the top stayed crisp after cooling, as did the ends. The sides aren’t as soft as before, but they aren’t crisp like the top. I’m thinking that most of the misting hit the top. So of course, I will have to try again! I’ll do the same thing with the dough, except I will make sure to mist the entire loaf on all sides. Hopefully this time I won’t be distracted so I can take pictures of the actual dough as well, which I forgot to do tonight. Tomorrow I’ll also be making the Sicilian Thick Crust Pizza from the same book (started the sponge on Thursday). Hopefully it turns out.
Hi Brian,
I think this latest loaf looks pretty damn good. You may have figured it out. You may be in for a nice future with bread like that. Also, Sicilian is my favorite. I grew up north of NYC and that style of pizza was everywhere. I can’t seem to find it anywhere else in the country because no one knows what it is. If I miss one thing about New York, it’s that.
Keep up the good work!
Jay
Thanks! I decided to leave the bread on the counter over night as an experiment, and this morning all the crust was nice and crispy.
By the way, the dough for the Sicilian-style thick crust pizza is amazing! Soft and pillowy on the inside, crisp on the bottom!
Hi Brian,
That’s awesome. I wish you had a website or something where you post these pics. I’d love to see them.
Jay
I actually thought about making a YouTube channel where I test America’s Test Kitchen, but then I saw Food Wishes on there, and he films the same way I would have. Then I thought about doing this kind of site, but you’re already here doing that, and I wasn’t sure of the legality of listing the exact ingredient amounts for a recipe and whether an actual recipe can be copyrighted.
I generally post the pictures I do take to Facebook, but maybe having a site is not a bad idea 🙂
Hey folks, this was fun to make but i found it really salty, and not nearly as flavorful as i was hoping. I think i will try letting it rise for more time and cut on the salt, I wet my yeast in the measurement of [warm] water, And even added a pinch of sugar into the yeast as it was activating.
I am making this recipe now, following the recipe strictly, down to the brands recommended in the Bread Illustrated book. I am stuck in the kneading step (also the same brand recommended). After 8 min the dough was glued to the walls and not elastic at all. I‘be been adding bread flour by the tbsp, then kneading, over and over. The dough clung to the walls until I added the 9th Tbsp (more than 1/2 cup). It now looks good and seems done, all detached, but it is still not elastic. And since it’s been more than 1 hour, the yeast has been consuming sugar and releasing CO2 all this time. I am hoping it will turn out ok, but not too hopeful. Presumably this will be solved next time by adding 1/2 cup more of flour to the initial mix. That’s ok. But how come my results are so different than yours and the book’s? I am in San Francisco, sea level, typically dry, room temp at 69-70°. Thank you!
I don’t see the beer in the ingredient list. Maybe it’s a glitch, I don’t know, but I can’t see it 🙂 Thanks!
Hi Lois,
In the ingredient list, I call it lager, not beer. Same thing.
Jay