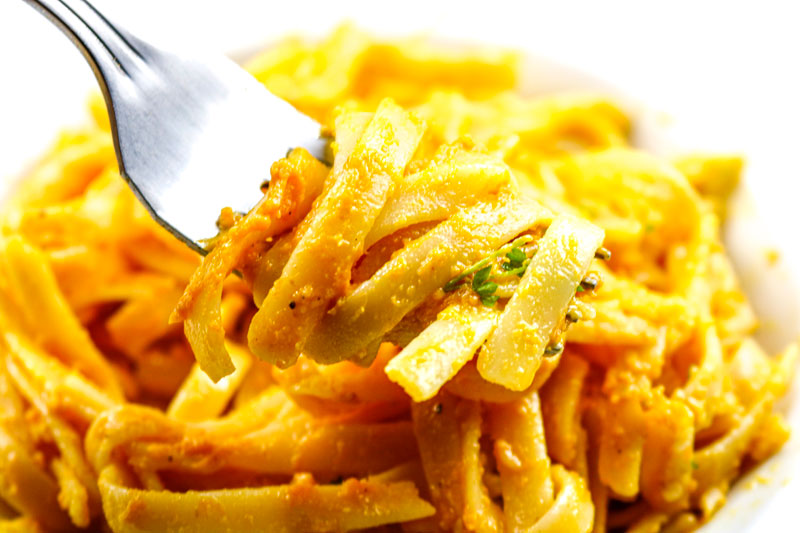
Classic alfredo sauce is simple, white, and creamy. It’s typically made with butter, cream, and parmesan cheese and is mixed with pasta noodles. This recipe calls for the use of healthy pumpkin puree instead of the traditional calorie-dense ingredients I just mentioned above. If you’re feeling a little adventurous or are on a pumpkin kick, […]
Gordon Ramsay’s Potato & Butternut Squash Gratin with Crispy Shallots Recipe

What exactly is a gratin? 1. A gratin is always baked and/or broiled in a shallow dish. 2. The topping traditionally consists of cheese or breadcrumbs. They should be melted or crisped under a broiler. 3. “Gratin” is derived from the French word gratiner – to broil. Gratter – to scratch or scrape is a […]
Gluten-Free Pumpkin Bundt Cake Recipe
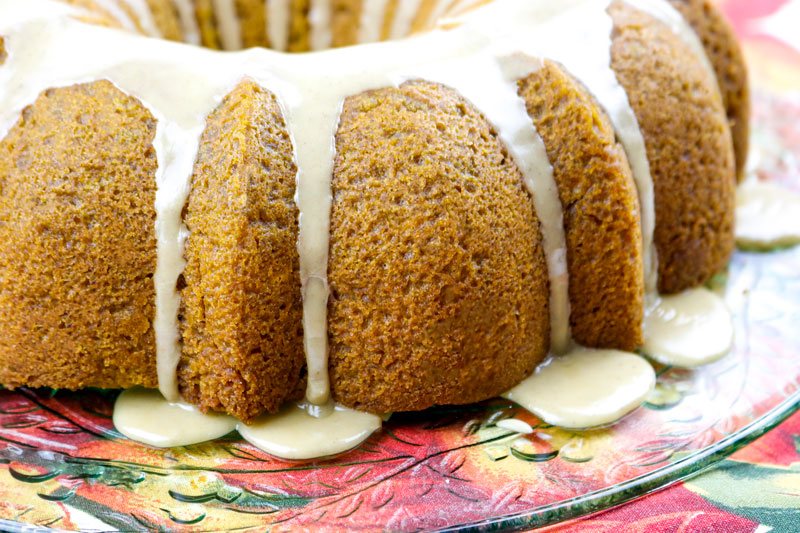
Bundt cakes make for gorgeous desserts and are a breeze to prepare. These cakes are wonderful treats because the batters are simple, the cakes look beautiful right out of the pan, and they require minimal icing and decoration. Bundt cakes can be made in a wide variety of flavors with some of the autumn leaning […]
Eat-the-Rainbow Chopped Salad with Basil & Mozzarella Recipe
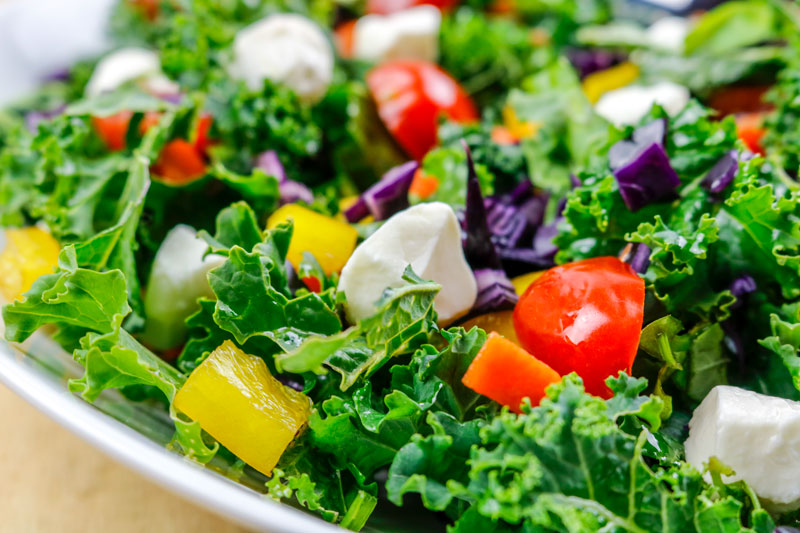
After a successful season of growing kale in the garden, I wanted to take advantage of the last of it by preparing a healthy and tasty salad. Recently, I discovered and enjoyed a flavorful Caprese-style recipe to utilize my garden kale. This leafy green helped to serve as the foundation for this fresh and vibrantly […]
Hummus Linguini with Zucchini Recipe
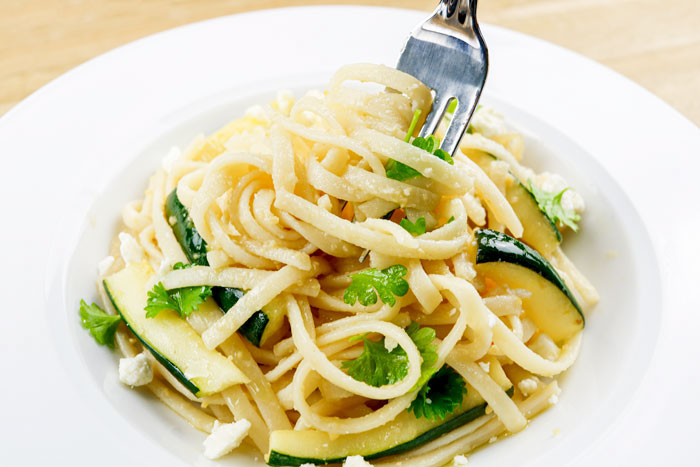
I had a wonderful zucchini season this past summer and in addition to making several zucchini bread loaves, I was on the hunt for finding a more savory recipe for this versatile fruit. Did you know that although it is treated and widely referred to as a vegetable, zucchini is actually a fruit? Anyway, I […]
Pasta with a Creamy Crushed Walnut Sauce Recipe
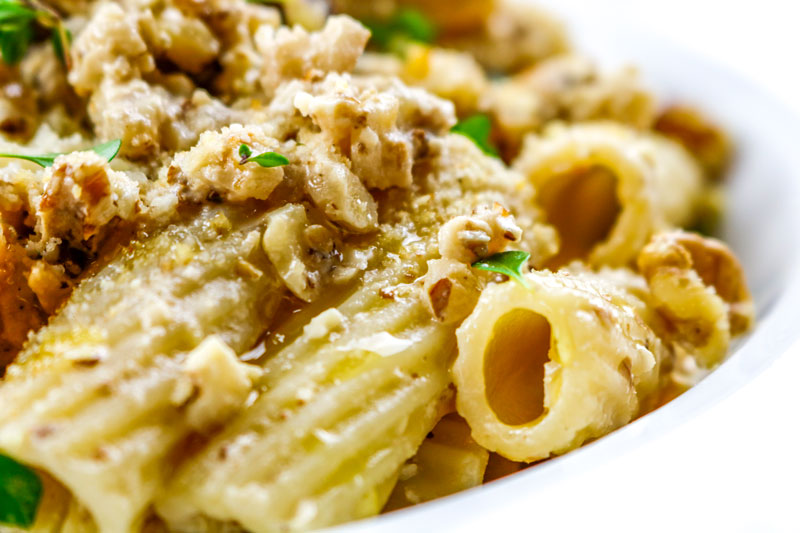
While searching for new recipes to prepare, I found an interesting pasta with creamy crushed walnuts sauce dish that I just had to try. It calls for a favorite short-shaped pasta; I chose to use rigatoni and it worked out perfectly. This creamy pasta dish is ready in no, consists of only a few steps, […]
Giada De Laurentiis’ Gluten-Free Pear & Caramel Cake Recipe
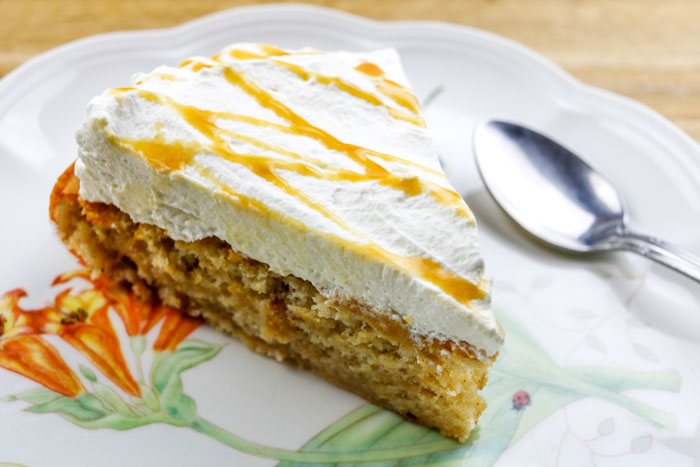
A couple of weeks ago, our thoughtful and generous neighbor from a few houses away gifted us with a large bag of pears. He has two big pear trees on his property that bear beautiful fruit during the fall season. After searching the internet, I thought I would give a pear related recipe a whirl. […]
Pasta & Garlic Mayonnaise Salad Recipe

If you are looking for a flavorfully elevated pasta salad that has a combination of sweet taste and a lot of crunch, this is the salad for you. Some of the ingredients you will enjoy include apples, walnuts, and celery. This abundance of flavors is all brought together with freshly prepared mayonnaise. The Recipe This […]
Williams Sonoma’s Vegetable Stir-Fry with Bean Thread Noodles Recipe
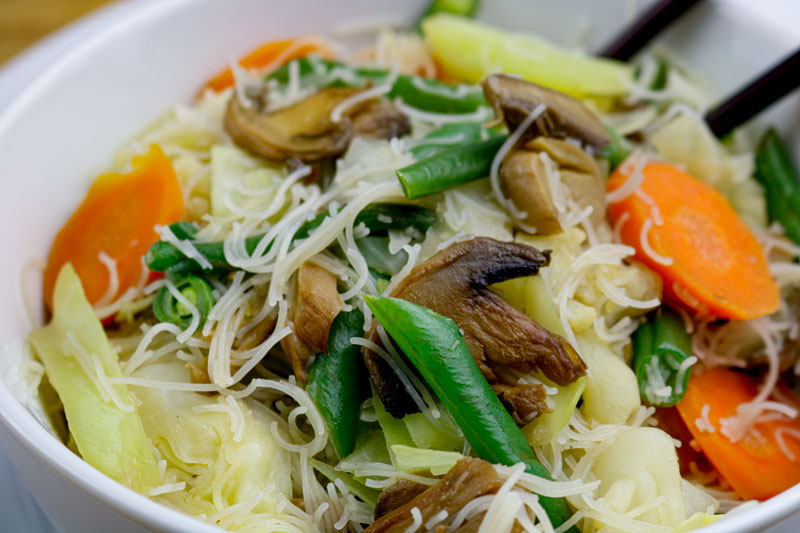
As dinner time approaches, instead of reaching for a takeout menu, why not try making your own stir-fry at home? This recipe combines both dried and fresh vegetables, producing exceptional flavors married together and absorbed by bean thread noodles. This was a big hit in our household and you too can recreate the magic of […]
Feta Cheese, Walnut, & Pasta Salad Recipe
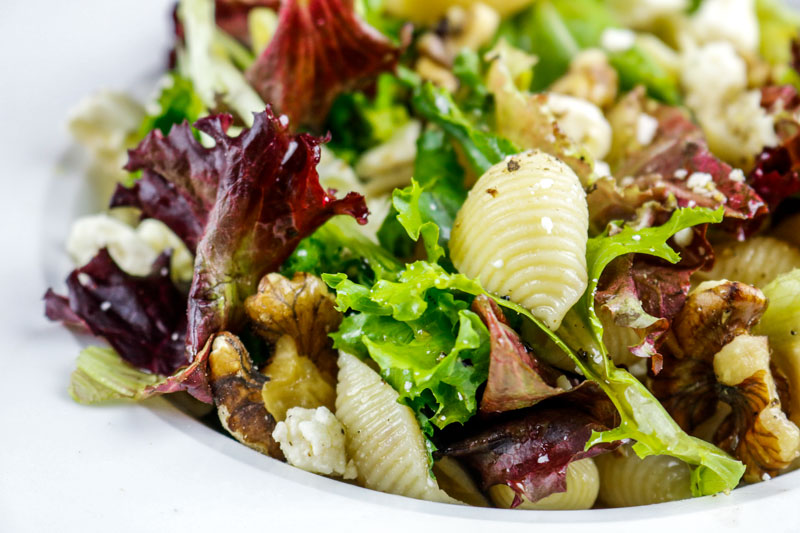
Jay and I enjoy a basic salad every night with dinner. Although what we usually prepare is fantastic, we still like to switch things up every so often. This feta, walnut, and pasta salad is just what we were recently looking for. The mixed salad greens provide nice and vibrant colors that are both a […]
- 1
- 2
- 3
- …
- 43
- Next Page »